
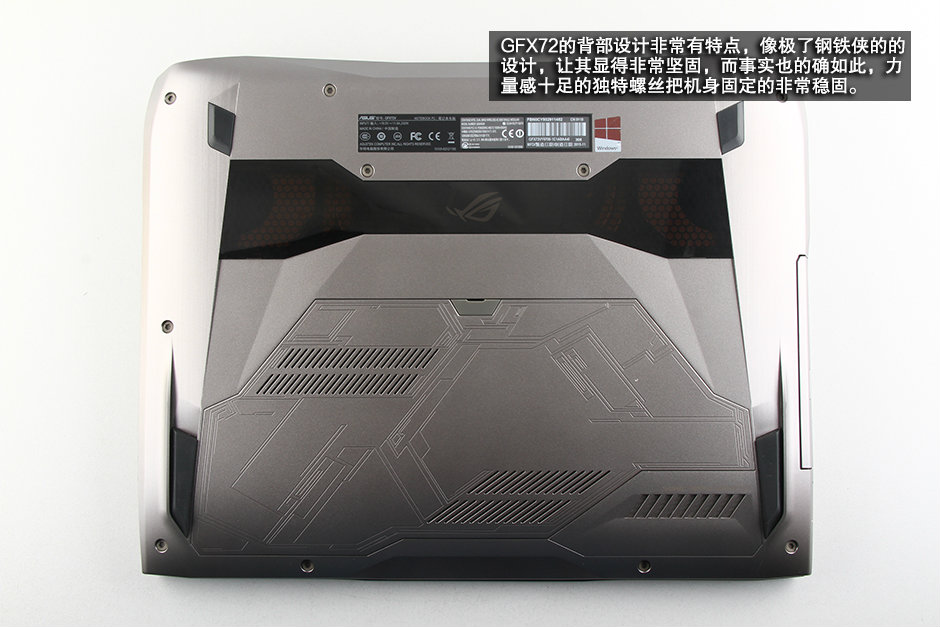
At IFA 2015, Asus unveiled its ROG G752. The biggest spotlight is the water-cooled system. Asus has confirmed that the water-cooled system is only available on the G752VY. Today, we will disassemble the laptop.
Want to be the first to see inside the latest gadgets? Follow us on Facebook for the latest news from MyFixGuide.com.
Specifications
Screen: 17.3-inch, 1920 x 1080 resolution, matte, IPS, non-touch
Processor: Intel Skylake Core i7-6700HQ CPU, quad-core 2.6 GHz (3.5 GHz TBoost)
Graphics: Nvidia GTX 980M 4GB GDDR5
Memory: 16GB DDR4 2133Mhz (4 x DIMMs)
Storage: 1TB 2.5″ 7200 rpm HDD, 256GB PCIe G3 SSD
Connectivity: Intel 7265, Gigabit LAN, Bluetooth 4.0
Ports: 4x USB 3.0, 1x USB 3.1(Thunderbolt 3), HDMI, miniDP, earphone, SPDIF, SD card reader, LAN
Battery: 67Wh, 6 cells
Operating system: Windows 10
Weight: 4.3kg
The ASUS ROG G752VY laptop supports easy upgrades for common components, such as memory, hard drive, and SSD.
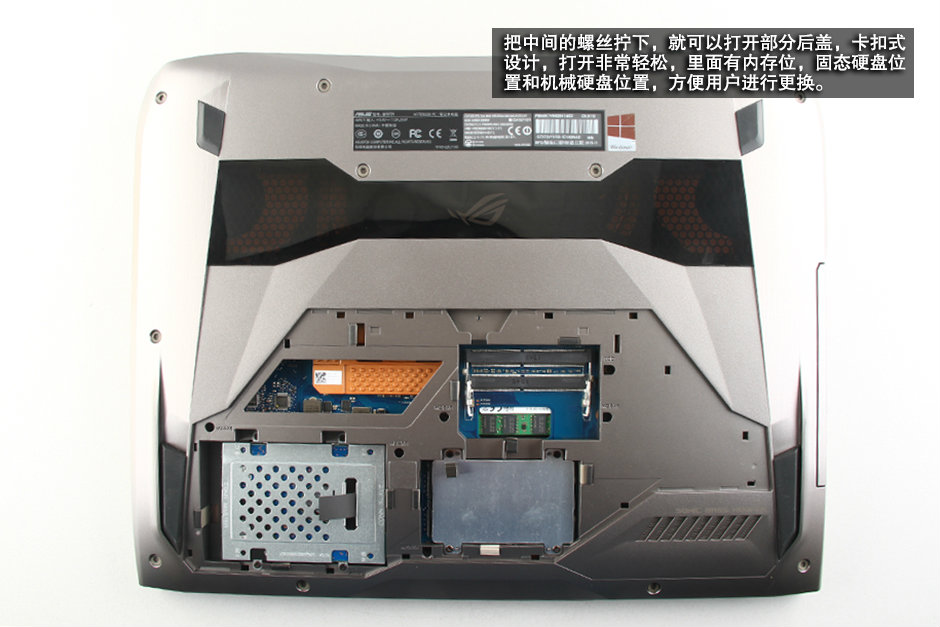
1. Remove the service cover
Open the rubber mat, and you will find a hidden screw. Remove the screw.
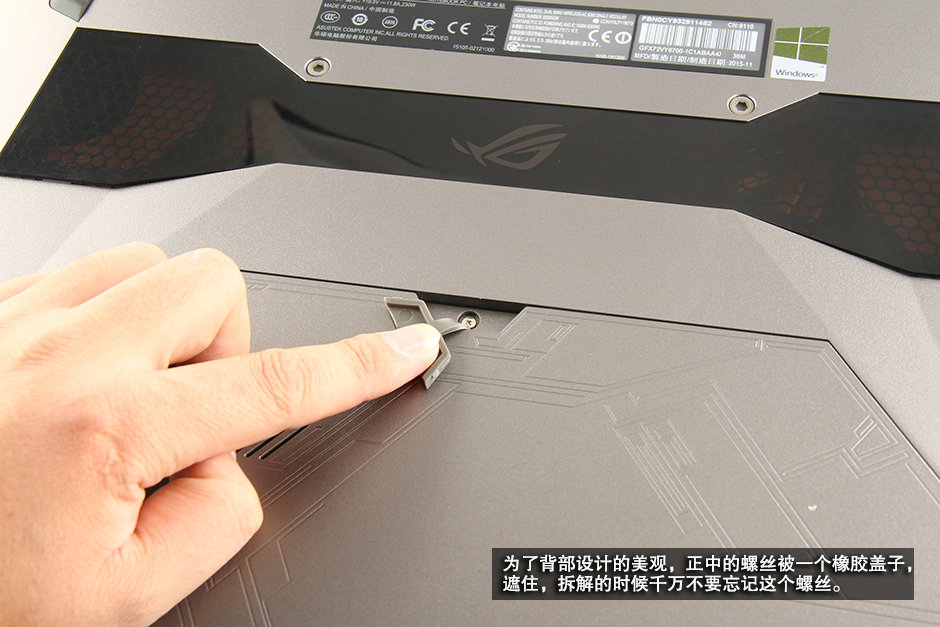
Use a flathead screwdriver to pry up and remove the service cover.
Under the cover, you will be able to access a hard drive, two spare RAM slots, and SSD slots.
The ROG G752VY supports up to 64GB of DDR4 memory. The other two RAM slots are located on the other side of the motherboard.
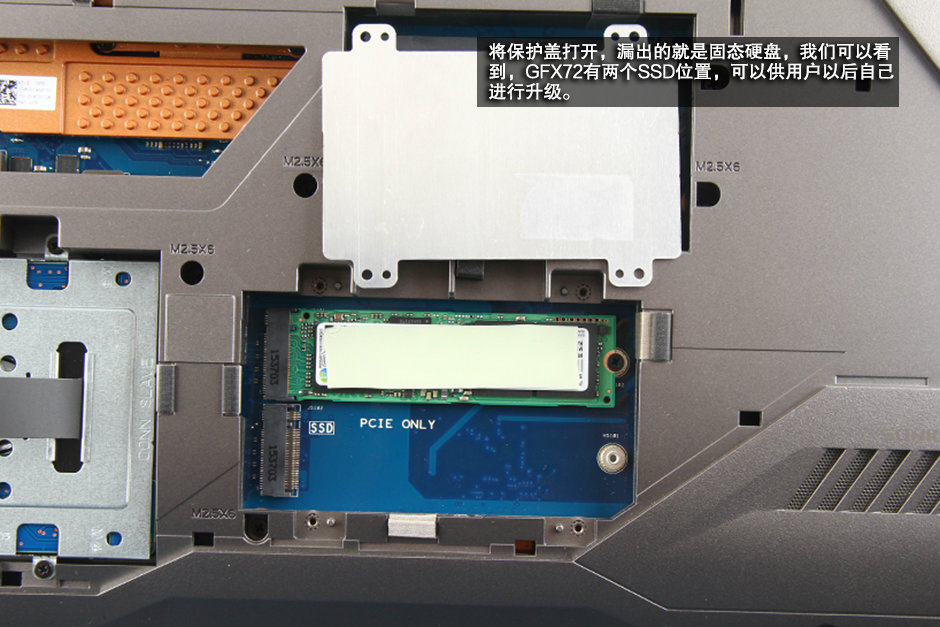
2. Remove the SSD
Unscrew the four screws that secure the protective cover, and then remove it. You can access two M.2 PCIe slots.
Remove the screw securing the SSD and carefully remove it from the M.2 PCIe slot.
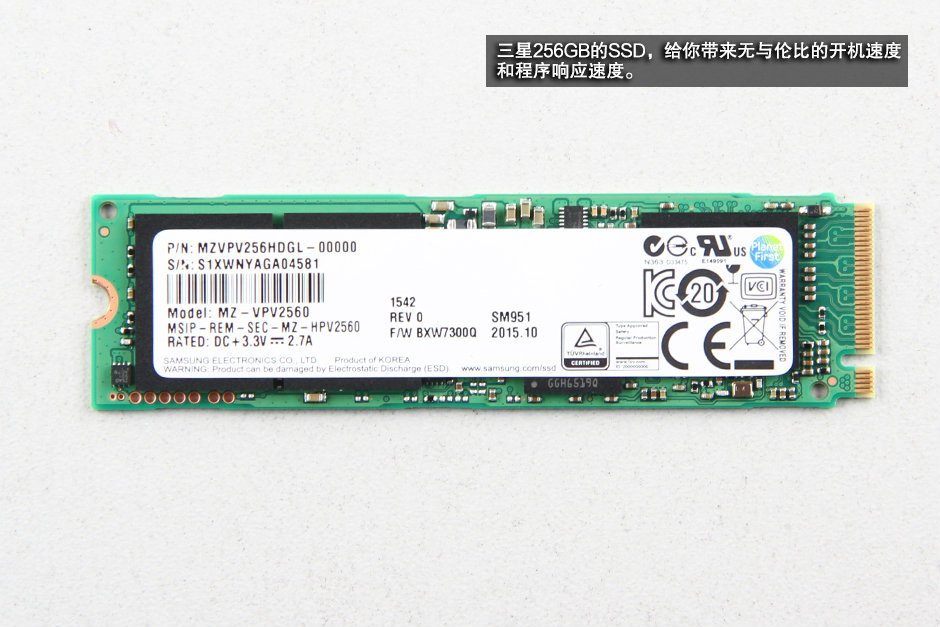
The Asus ROG G752VY comes with a Samsung SM951 256GB M.2 SSD. You can install another M.2 PCIe SSD into the spare M.2 slot. As far as we know, the motherboard doesn’t support RAID 0 configuration.
The MZ-VPV2560 SSD uses the latest in-house NAND flash and an advanced in-house controller to deliver superior performance. Sequential read up to 2150 MB/s, sequential write pp to 1260 MB/s, random read up to 300K IOPS, random write up to 100K IOPS.
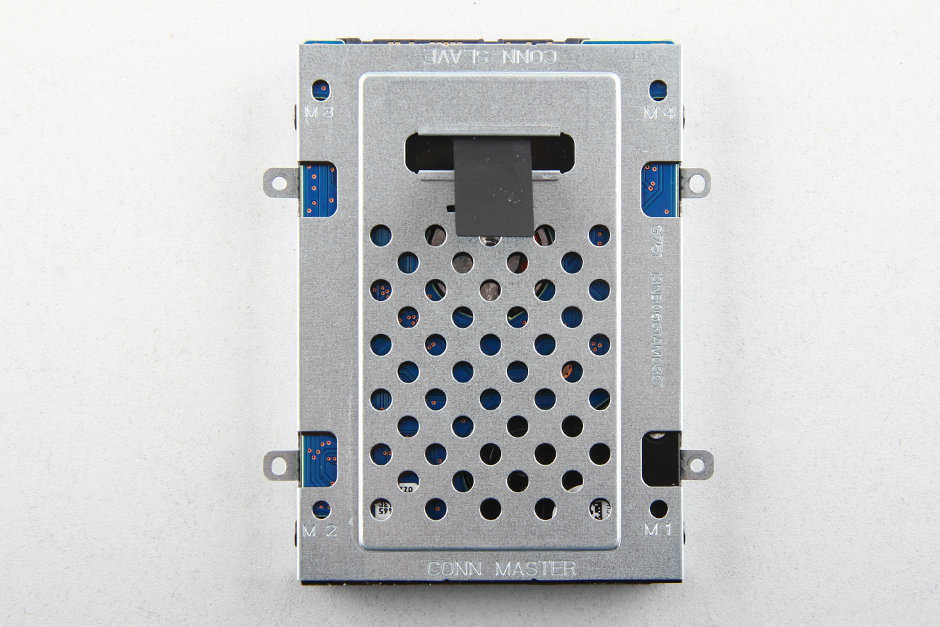
3. Remove the hard drive
Remove the four screws securing the hard drive module. Lift the black tape and slide it to the left. You can remove the hard drive module.
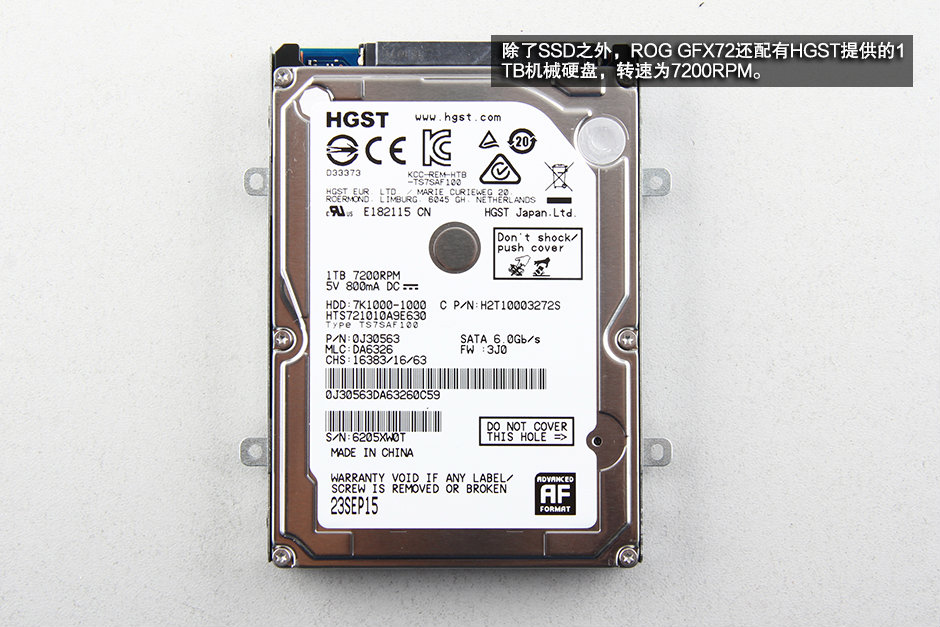
The Asus ROG G752VY features a 2.5-inch HGST 1TB 7200 RPM SATA hard drive.
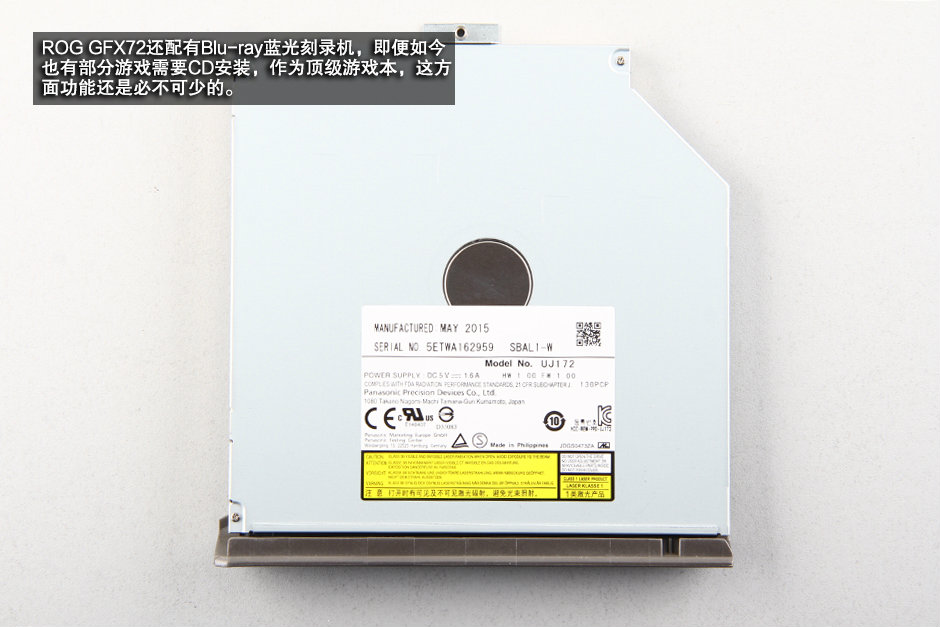
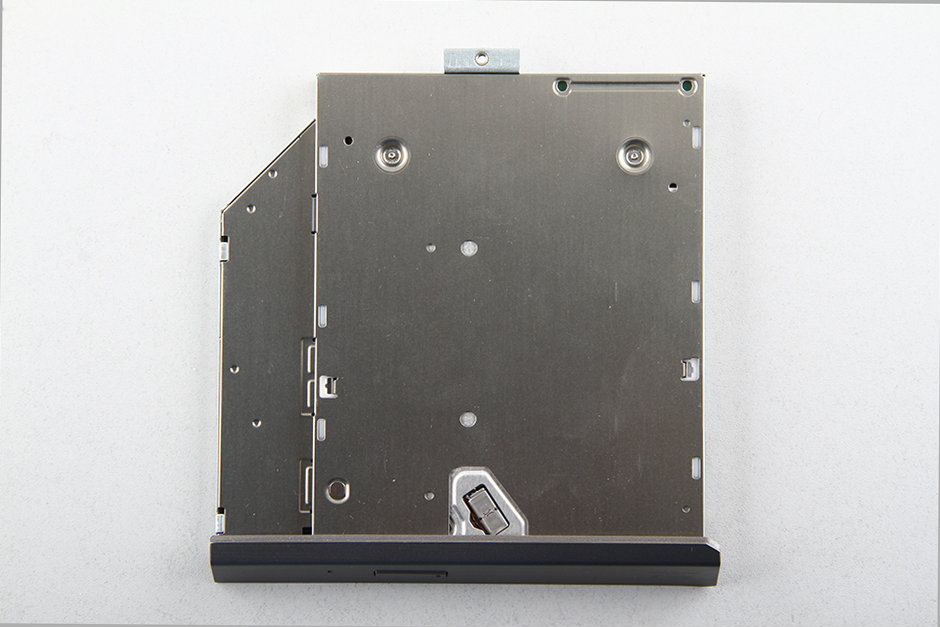
4. Remove the optical drive
Unscrew one screw securing the optical drive, the screw beside the RAM slots.
Slide the drive to the right and pull it out of the laptop.
The gaming laptop comes with a Panasonic UJ172 6X 3D Blu-Ray combo drive.
5. Remove the palm rest
Remove all screws from the bottom cover.
Turn over the laptop. Pry up the palm rest with a plastic pick. Lift the palm rest and disconnect the keyboard cable, touchpad cable and backlit cable. You can remove the palm rest.
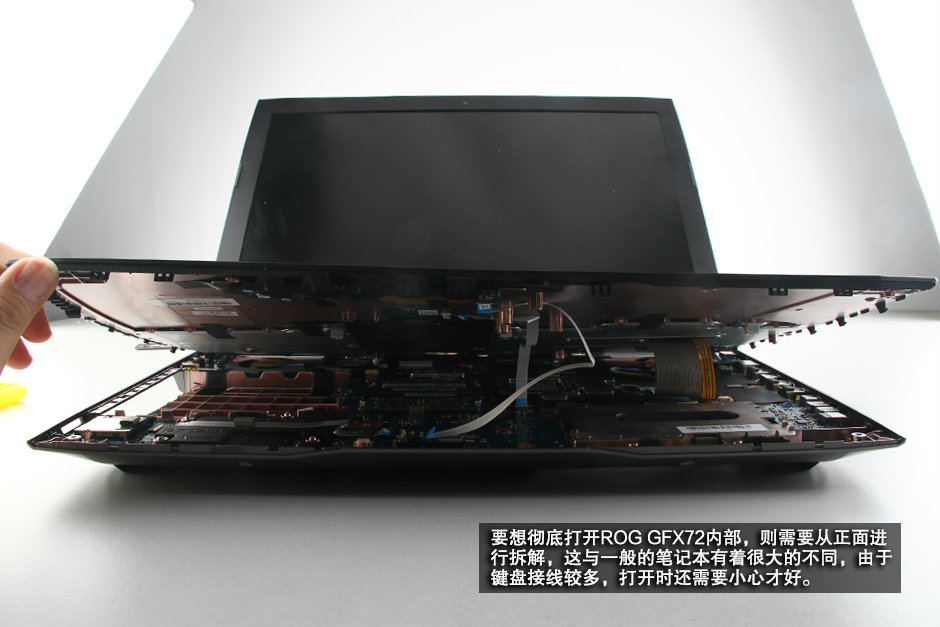
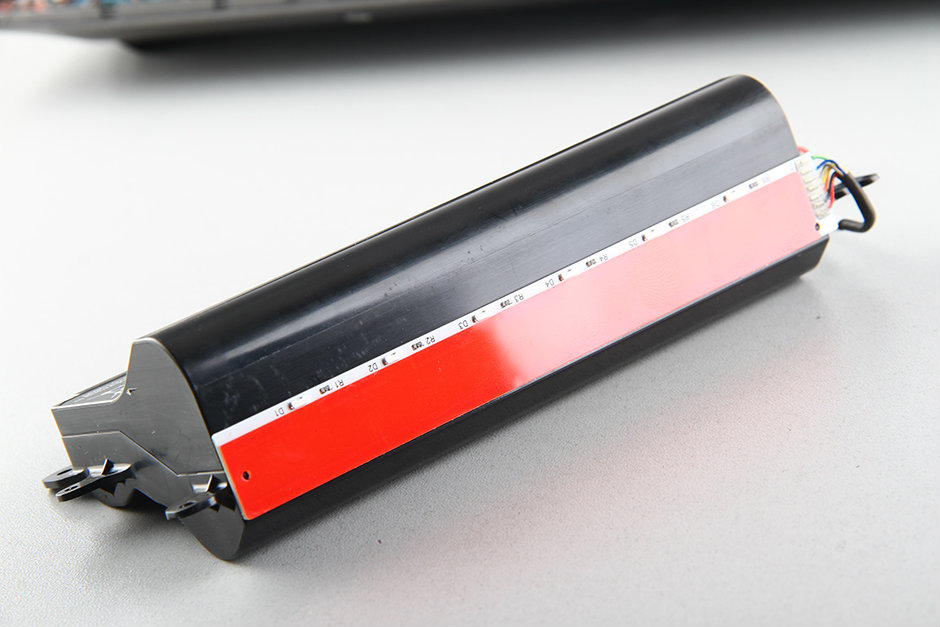
6. Remove the screen assembly and speaker module
Remove the speaker modules and disconnect the speaker cable.
Remove all screws securing the LCD hinges (left and right) and disconnect the LCD cable from the motherboard. You can remove the display assembly.
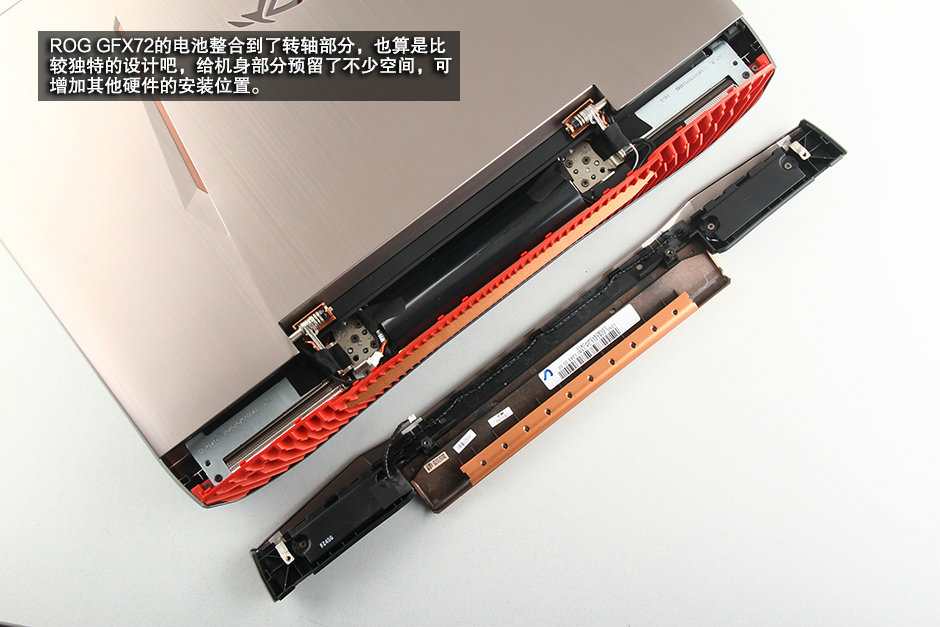
7. Remove the battery
Remove the four screws securing the battery. Disconnect the battery connector from the motherboard, and you can remove the battery.
The Asus ROG G752VY features a 90Wh Li-ion battery, and the Asus part numbers are A42NI520 and 4ICR19/66-2.

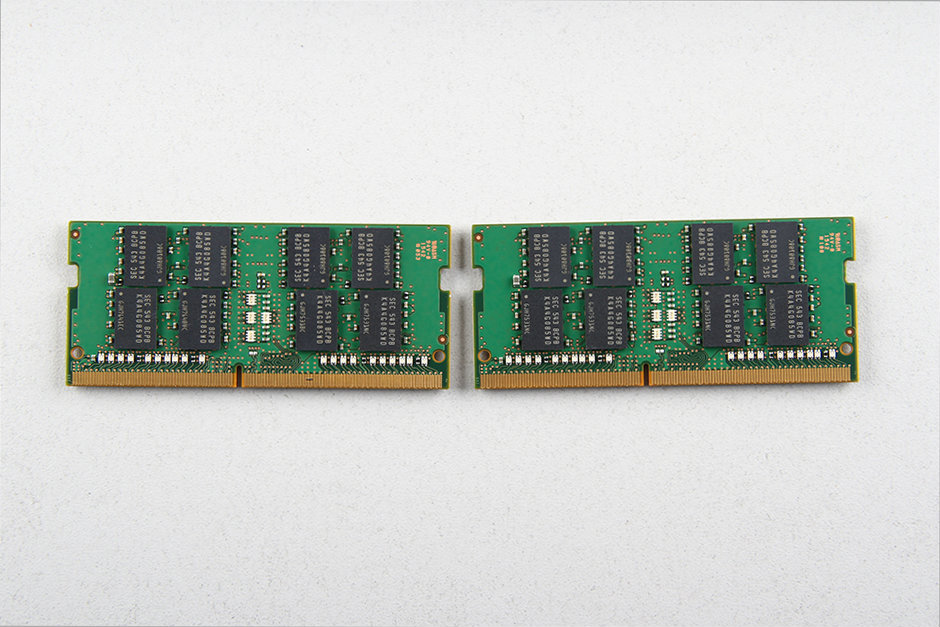
8. Remove the RAM
Use your nails to separate the clips on both sides, and the memory module will pop out automatically.
The Asus ROG G752VY features four DDR4 slots, allowing you to upgrade to 64GB DDR4 RAM.

The laptop features two Samsung 8GB PC4-2133P RAM modules.
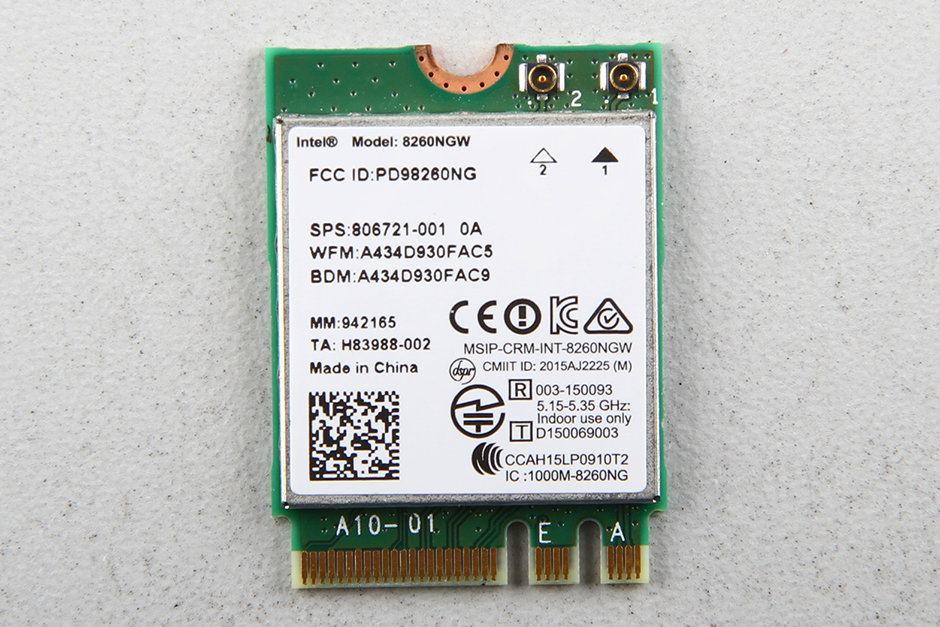
9. Remove the wireless card
Remove one screw and unplug two wireless antenna cables. You can remove the wireless card.
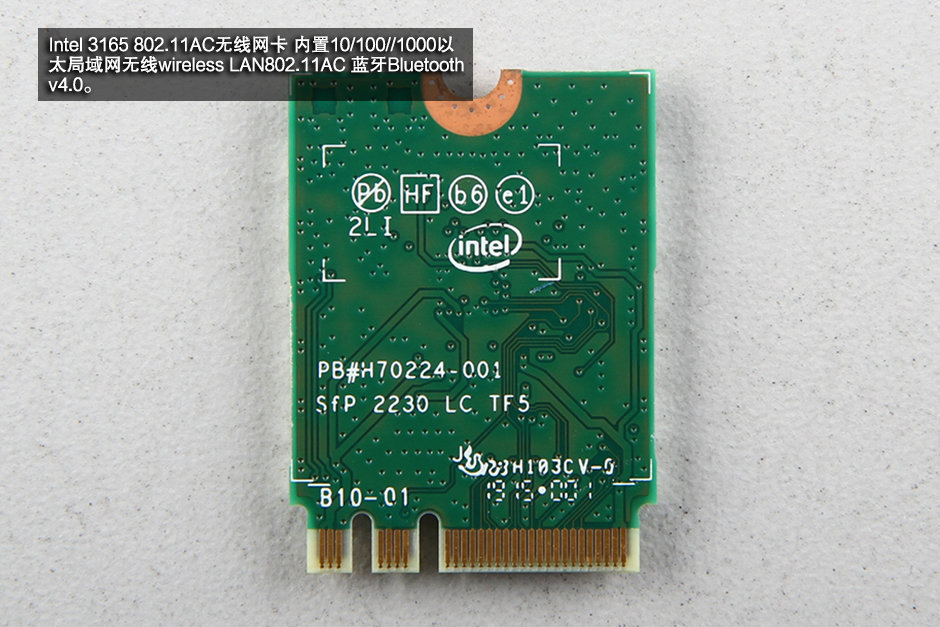
The laptop comes with an Intel Dual Band Wireless-AC 8260 wireless card, which supports 802.11ac, dual-band, 2×2 Wi-Fi and Bluetooth 4.2.
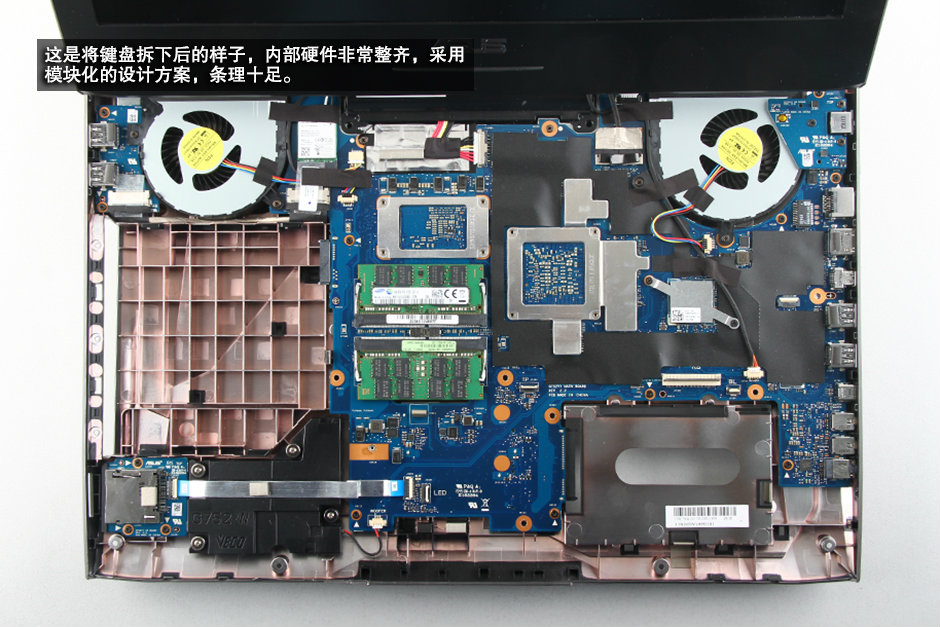
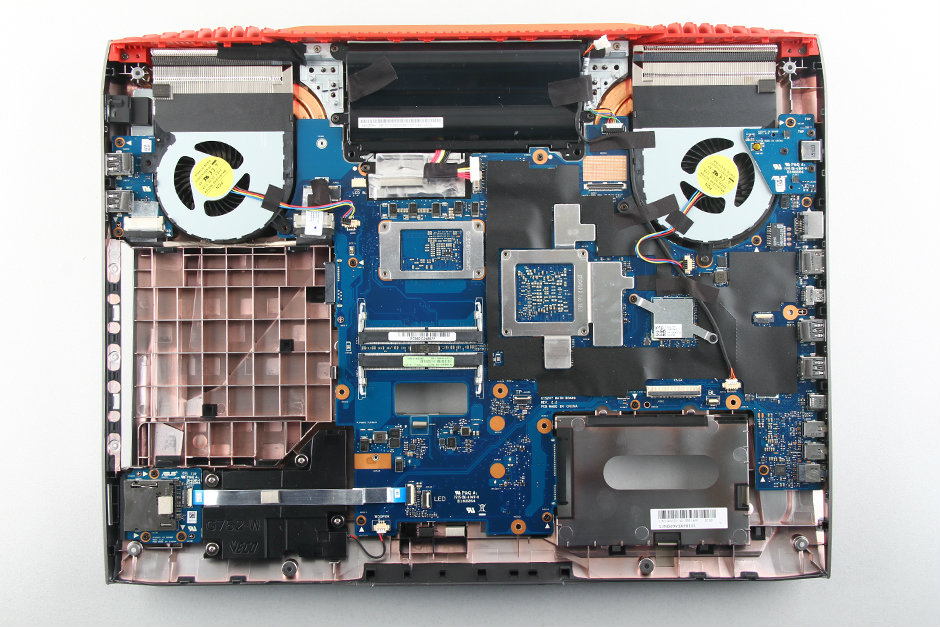
10. Remove the motherboard
Remove all screws securing the motherboard and disconnect all cables.
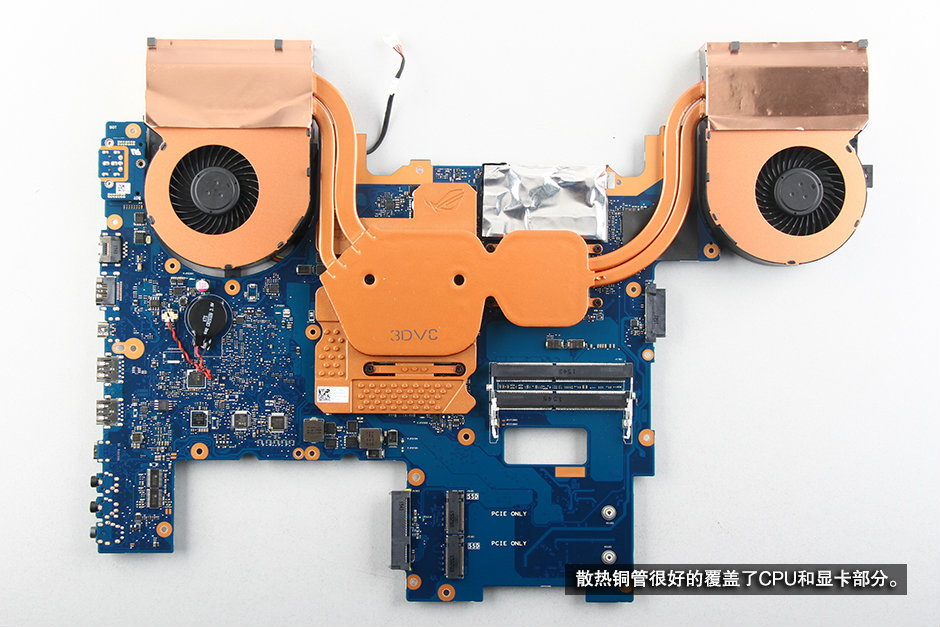
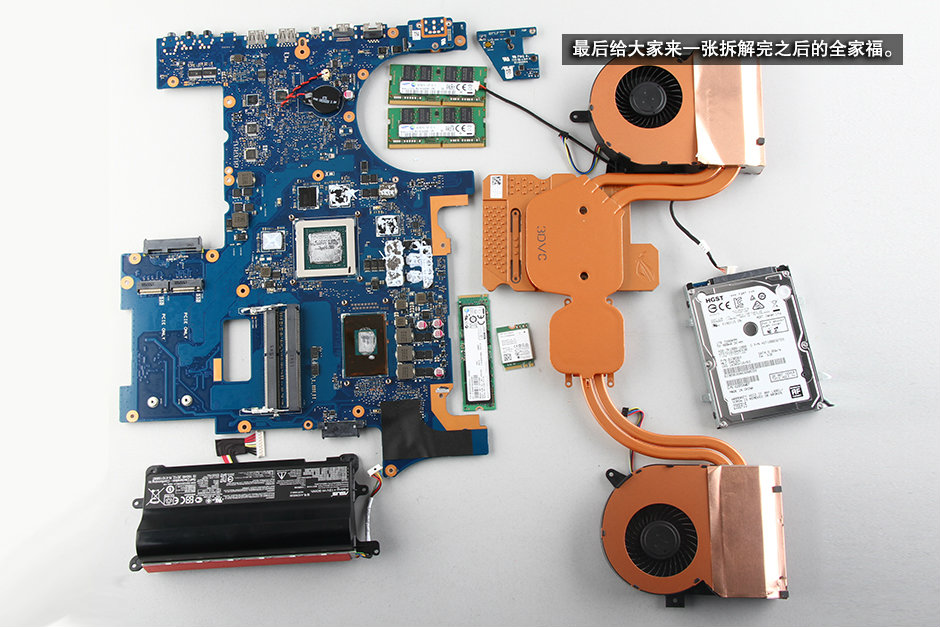
On the motherboard, you can access the CMOS battery, heat sink, and cooling module.
11. Remove the heat sink and cooling fan
On the other side of the motherboard, you can access two cooling fans.
Remove all screws securing the heat sink and cooling fan.
Unplug two fan cables from the motherboard.
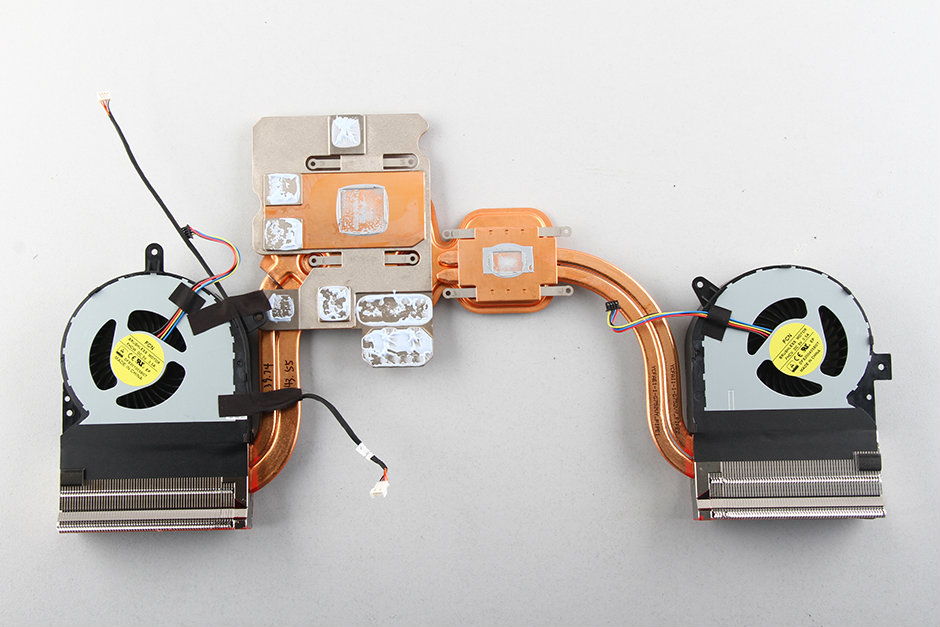
Asus ROG G752VY cooling system
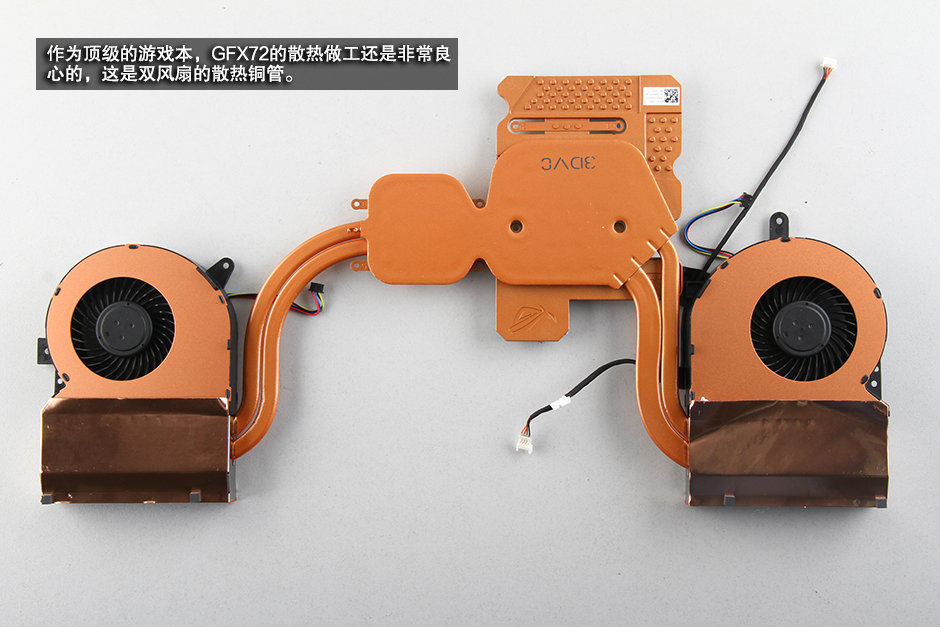
The cooling system of the Asus ROG G752VY consists of two fans and two copper pipes, which not only cover the processor and graphics card but also cover the memory chips of the graphics card.
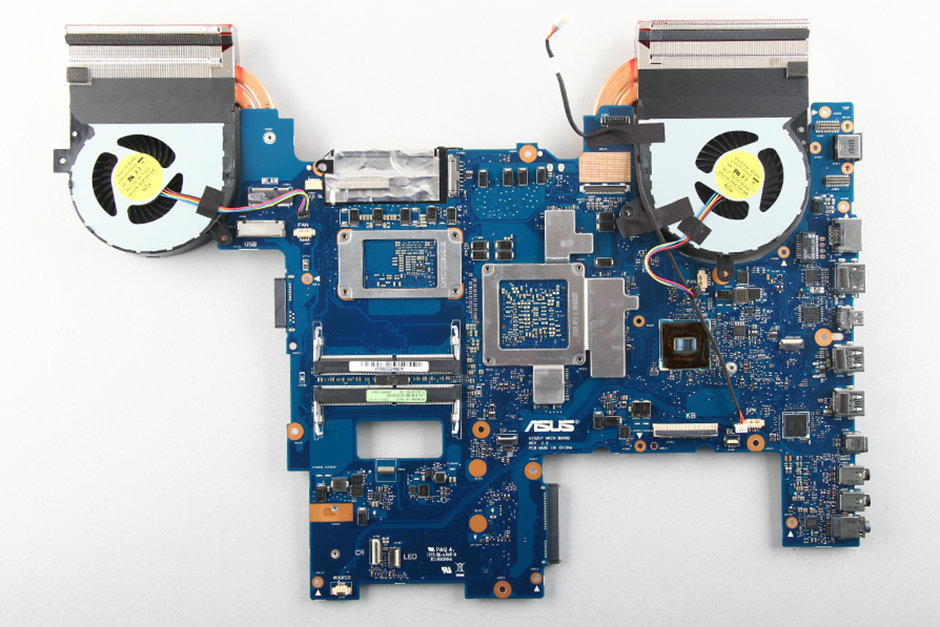
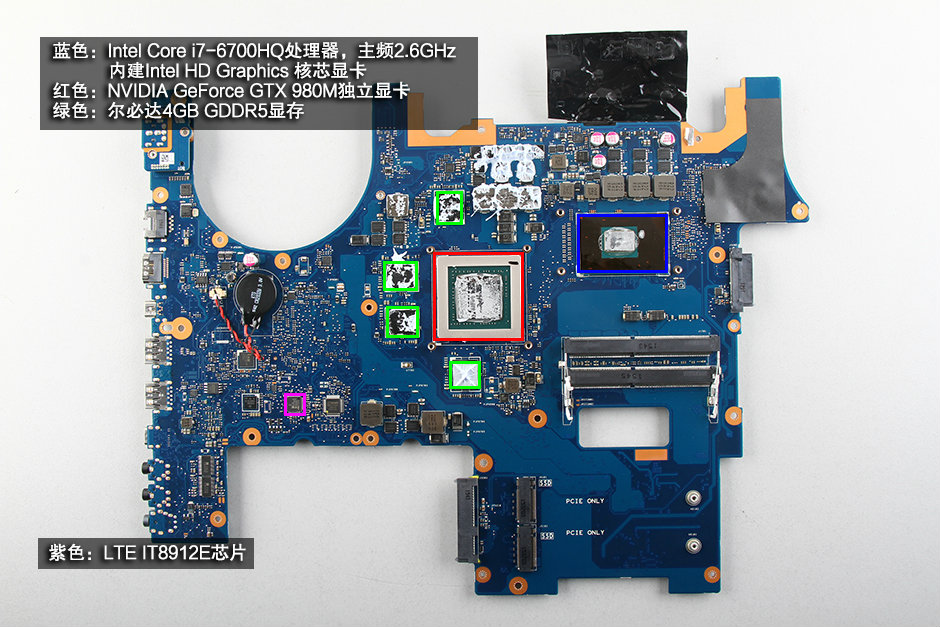
Blue: Intel Core i7-6700HQ processor (6M Cache, up to 3.50 GHz)
Red: NVIDIA GeForce GTX 980M graphics card
Green: Elpida 4GB GDDR5 video memory
Purple: LTE IT8912E
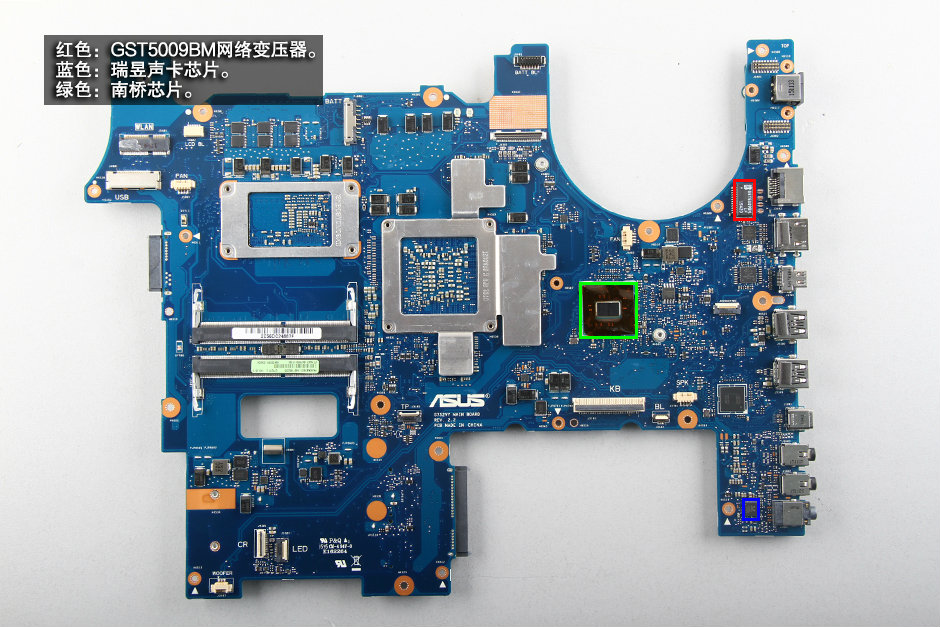
Blue: Realtek sound card chip
Red: GST5009BM network transformer
Green: South Bridge chip
Asus ROG G752VY internal parts
Thank you so much! This is a perfect page for me. It’s exactly what I needed. Thanks a million!
Are you having a problem with a backlight bleed? I have a G752, but I have a problem with the screen.
They are all like this; mine is new and has the same issue. They also tell you this in the manual.
If I want to replace a damaged display, is there a way to disassemble the display screen to install another one?
I hope this is not an off-topic question and can be answered.
I am trying to get information about an unknown part on the board. I am able to see the part in the 3rd picture. It is just above the CMOS battery. It is round and silver. I don’t know how it is connected to the motherboard. I can’t see any soldering. There is red lettering, but it is hard for me to read.
Can you tell me if it can be removed, or any other information about the part?