Laptop overheating is very common, and many people have experienced it, especially in summer. Generally speaking, the heat dissipation performance of the laptop is not good, which can easily lead to the laptop breakdown, blue screen, and other issues.
In this article, I will explain the reasons for laptop overheating and three ways to stop overheating. This guide applies to all laptop brands, including Acer, Asus, Dell, Apple, Lenovo, HP, Toshiba, etc. Through these methods, you can easily cool down your laptop and extend the life of your laptop components.
Why your laptop is Overheating
1. Too much dust.
Too much dust can block the vents of the laptop, resulting in poor air circulation inside the laptop and the inability to dissipate the heat inside the laptop. At the same time, dust will also adhere to the cooling fan, reducing the cooling efficiency of the fan.
2. Too many running programs.
When the laptop runs too many programs, the utilization of the CPU, memory, graphics card, hard disk, motherboard, and power supply is very high. When these components are used at a high rate, a lot of heat is dissipated so that the laptop will overheat.
3. Use environment.
When the ambient temperature of the laptop is too high, the heat generated by the laptop will increase, and the heat dissipation efficiency will decrease relatively.
How to stop your laptop from overheating
1. Use a laptop cooling pad
Although you can’t add a cooling fan inside the laptop, you can buy a laptop cooling pad or an exhaust radiator to enhance heat dissipation performance.
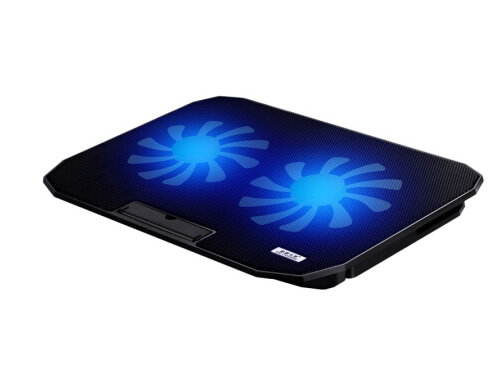
For users who use notebooks, it is especially easy to get hot when playing games in summer, and sometimes, it is impossible to solve the problem of high ambient temperature fundamentally by cleaning up the dust.
In this case, it is recommended to use a cooling pad or an exhaust radiator to enhance the heat dissipation performance.
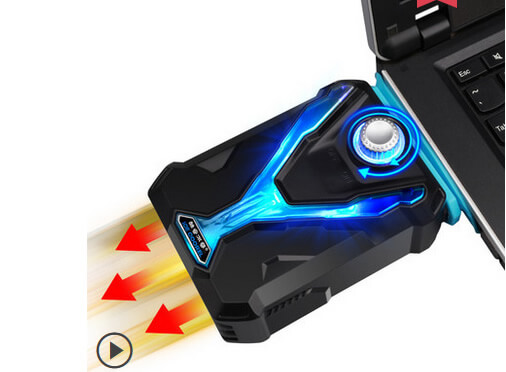
I have used both radiators. My suggestion is that the exhaust radiator has better cooling performance.
2. Clean Vents
After the notebook is used for a long time, the vents on the bottom and both sides may be covered with dust and lint, which will prevent the air from flowing, causing the hot air inside the laptop not to flow out. At this time, we need to clean the dust and lint covering the air vents; you only need to use compressed air and thin plastic tools to clean the dust.
However, these vents are located in different locations based on the laptop model. Before cleaning it, you need to find the right vents.
You can regularly clear the air vents, which can greatly reduce the possibility of component damage and can avoid the performance degradation of the laptop.
3. Clean the heatsink and CPU fan
After using the laptop for more than one year, its fan will be covered with a layer of dust, and the heat sink and CPU fan will cover a lot of dust and lint. We need to open the laptop to clean the dust, which is the only way to solve laptop overheating. However, many people have no experience in disassembling laptops. This method is relatively difficult.
Tools need:
1. Thermal grease
2. Screwdrivers
3. Brush
4. wiping rag
Step 1. First, we need to remove all the screws that secure the back cover, then insert an old credit card under the back cover and move the card to release the latch that fixed the back cover to the laptop.
Step 2. Disconnect the battery connector from the motherboard. This step is very important to avoid damaging the hardware.
Step 3. Remove all screws securing the heatsink and cooling fan, and disconnect the fan cable from the motherboard.
Step 4. Remove the fan from the heatsink and clean it with a brush. The most important thing is to clean up the dust and lint stacked on the vent of the heatsink.
Step 5. Then, use a brush to clean the dust from the heatsink and fan assembly. Clean the dust and lint from the heatsink and fan assembly bay.

Step 6. Use a wiping rag to remove thermal grease on the heat sink, CPU, and GPU chips.
Step 7. Apply new thermal grease to the CPU and GPU chip, then reinstall the heat sink assembly on the laptop.
To get better cooling, it is a better idea to replace your old fan with a new one. You can visit the parts store to buy a new CPU fan for your laptop.
Also Read: How to Clean a Laptop Fan and Heatsink
I believe the above three methods can solve your laptop overheating problem. If you encounter any problems during the process of cleaning up the dust, please leave a message in the comment box so that we can help you out.


Yes, we have added it to the list.
I have an HP Pavillion dv7t-4100 laptop. Its fan spins almost all the time, and my laptop gets hot and shuts down automatically. I know it has to be cleaned from the inside, and I did this a while ago. My question is this: I don’t remember if there was a thermal pad or thermal grease between the CPU/GPU and the heatsink. I have thermal grease on there now, but I suspect that the grease isn’t enough to fill the gap between the top of the CPU/GPU and the bottom of the heatsink. If the gap isn’t filled and there is space, then the grease isn’t going to transfer the heat to the heatsink. So no matter how fast the fan turns, the heat isn’t going anywhere. Whether there was grease or not initially, can I instead of slapping on new grease, put a thermal pad in between the CPU/GPU and the heatsink? Also, if the thermal pad isn’t thick enough to fill the gap, then can I stack thermal pads in order to build up thickness? Alternatively, if the thermal pad is too thick and has to be squeezed under the heatsink, then can the extra pressure on the CPU/GPU cause any problems, or will it work fine?
You should buy a thermal grease and apply it to your CPU and GPU instead of using a thermal pad.
I also face this problem you need to service the laptop by opening it and removing the dust inside the fan chamber