
In this guide, I will explain how to disassemble the Asus VivoBook S550CM to remove the battery, hard drive, SSD, DVD drive, wireless card, RAM, heat sink, USB board, cooling fan, and motherboard.
Looking for more guides? Follow us on Facebook for all the latest repair news.
Slide the battery switch to the left, then slide the battery downward to remove it.
Remove the two screws securing the service cover.
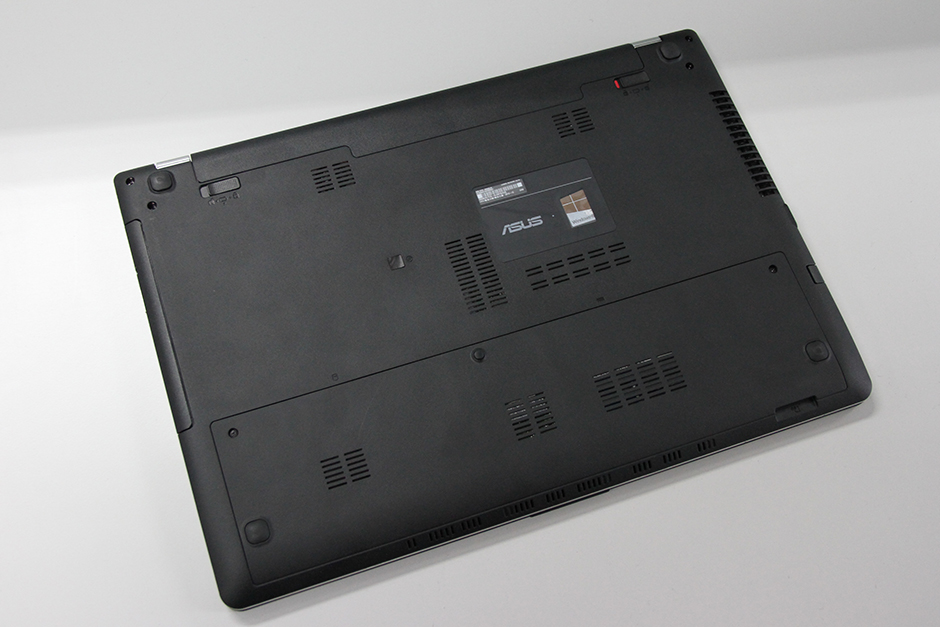
Insert a screwdriver into the gap on the service cover, gently pry it up, and remove the service cover.
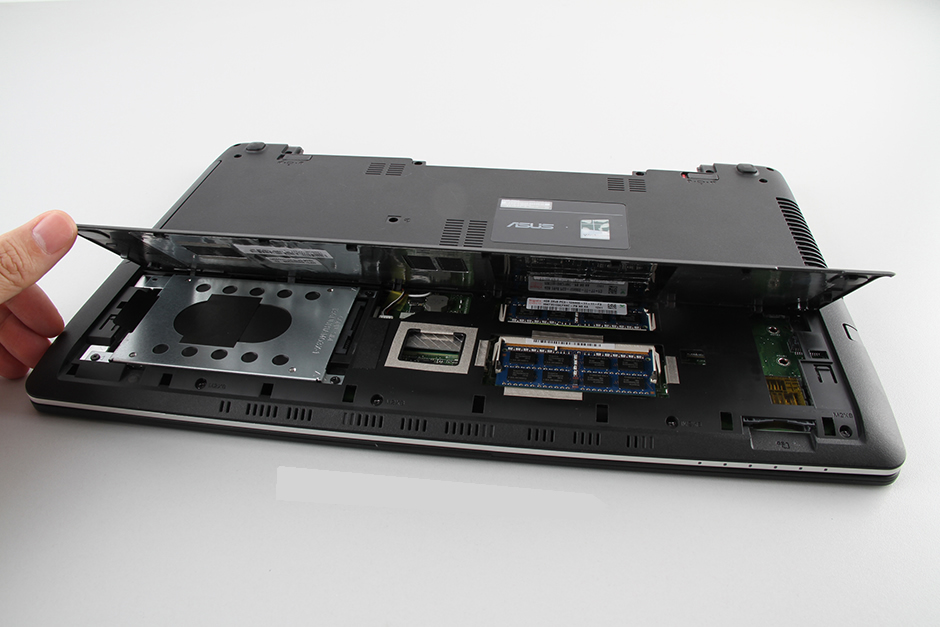
Remove the three screws securing the hard drive. Lift the black tape and slide it to the left.
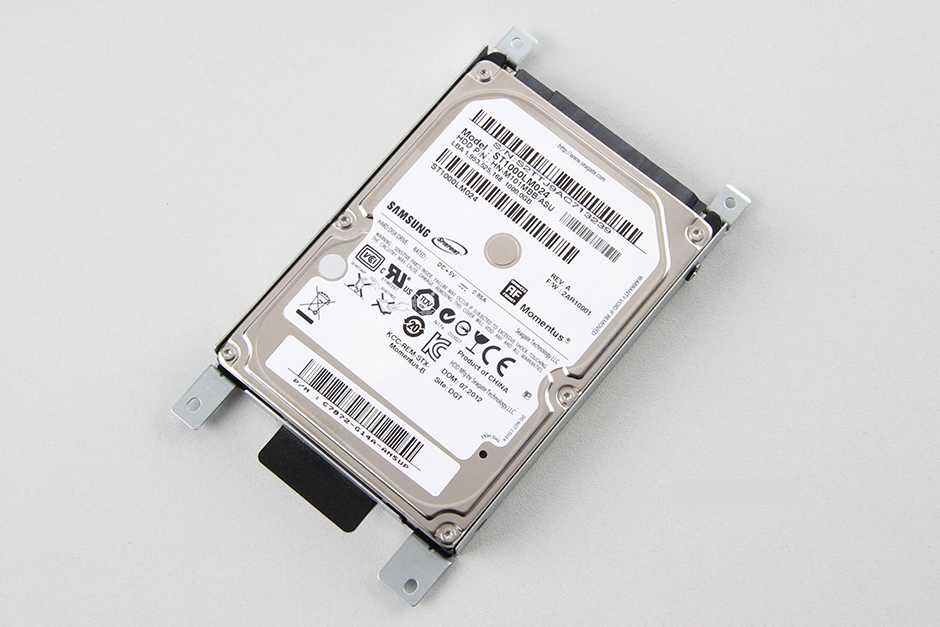
The laptop features a 1TB Samsung hard drive. This hard drive is installed in an HDD caddy. If you need to replace the hard drive, you need to remove it and install it in the new hard drive.
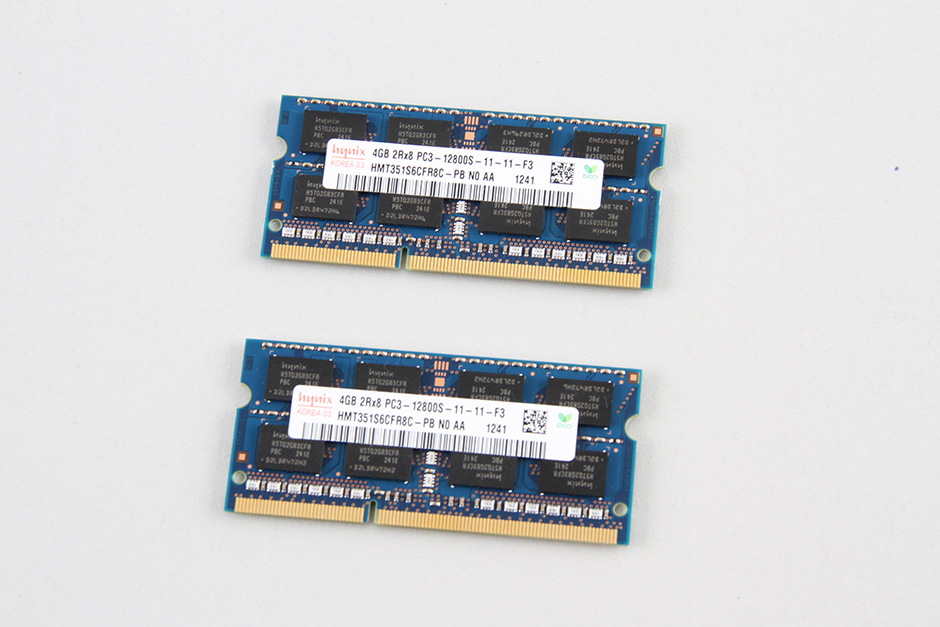
The Asus VivoBook S550CM comes with two 4GB DDR3 RAM modules. If you need to upgrade the memory, you will need to replace the existing memory modules.
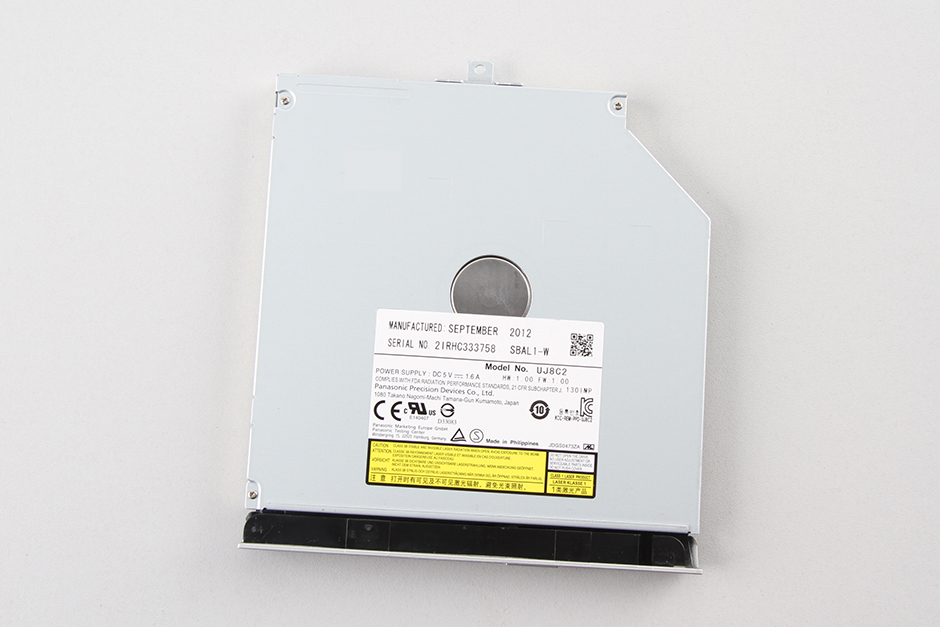
Remove the screw securing the DVD drive. Pull out the DVD drive.
The laptop features a Panasonic UJ8C2 9.5mm SATA DVD writer.
Remove all screws from the bottom cover. Insert a thin plastic prying tool between the bottom cover and the palm rest. There are some clips on the bottom cover to secure it to the palm rest, and you need to release these clips to remove the bottom cover.
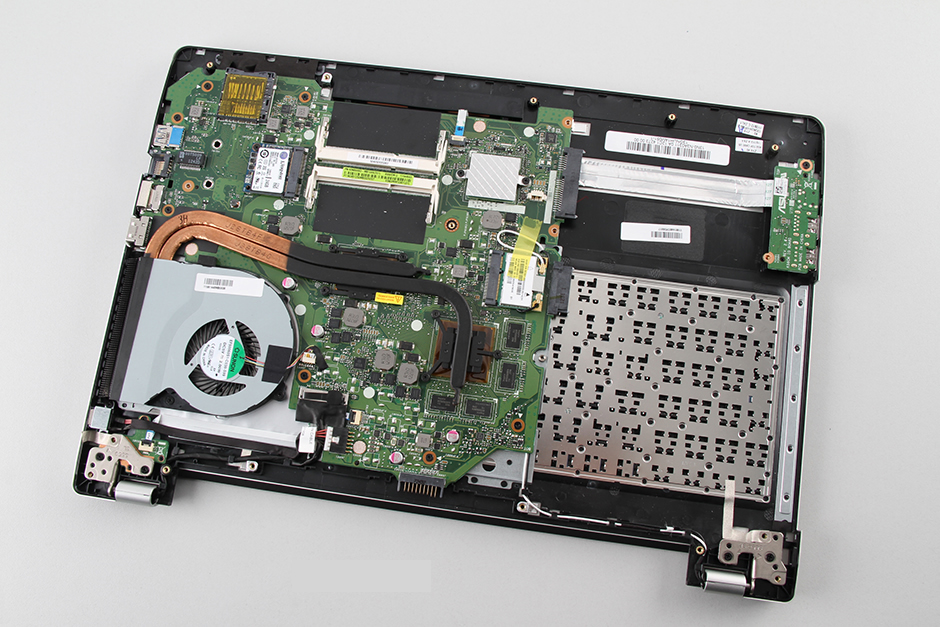
Under the bottom case, you can access the SSD, wireless card, heat sink, and cooling fan.
Remove the screw securing the SSD and remove it from its slot.
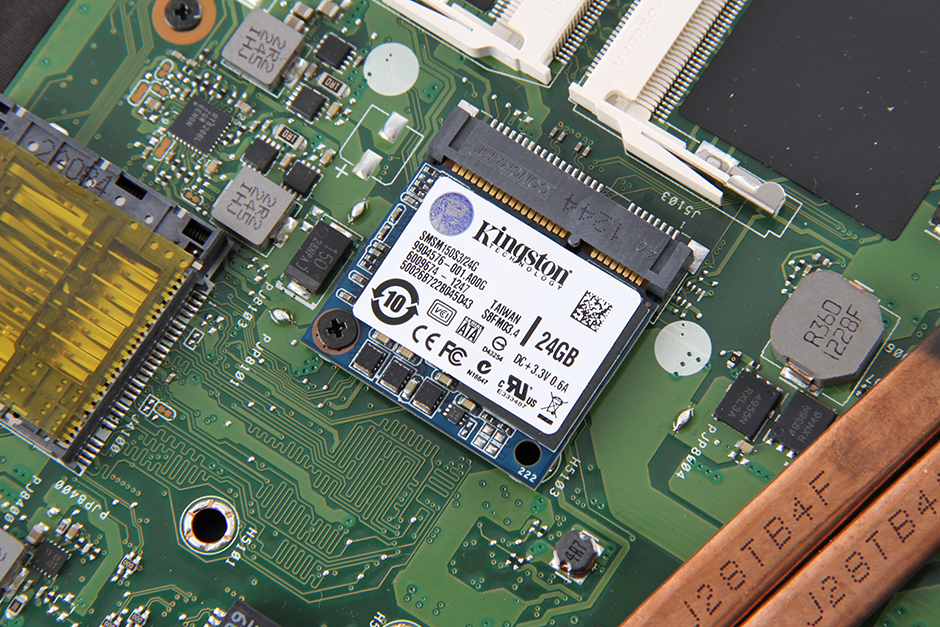
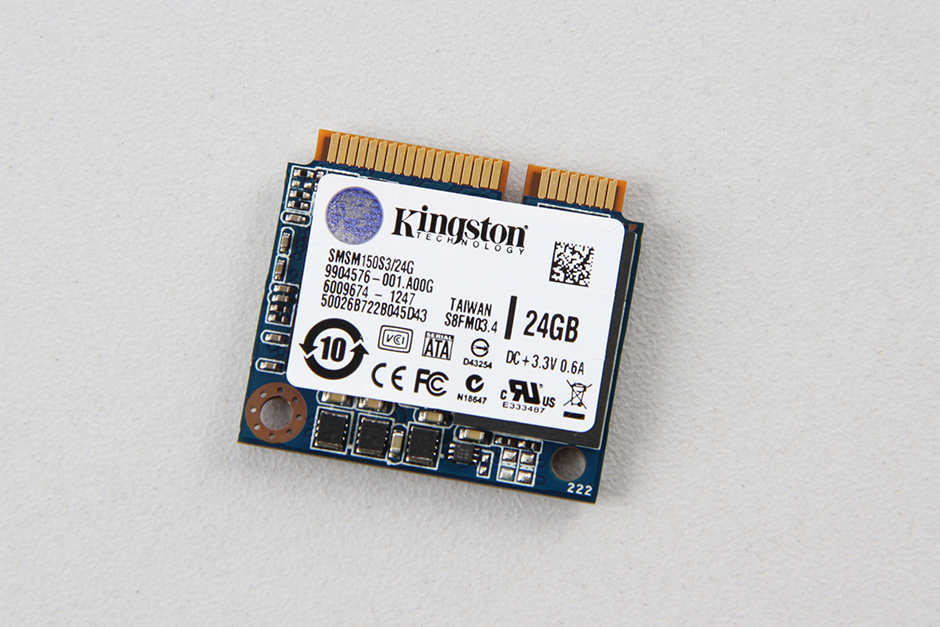
The Asus VivoBook S550CM comes with a Kingston 24GB SSD, made in Taiwan.
Disconnect the two wireless antenna cables and remove the screw securing the wireless card.
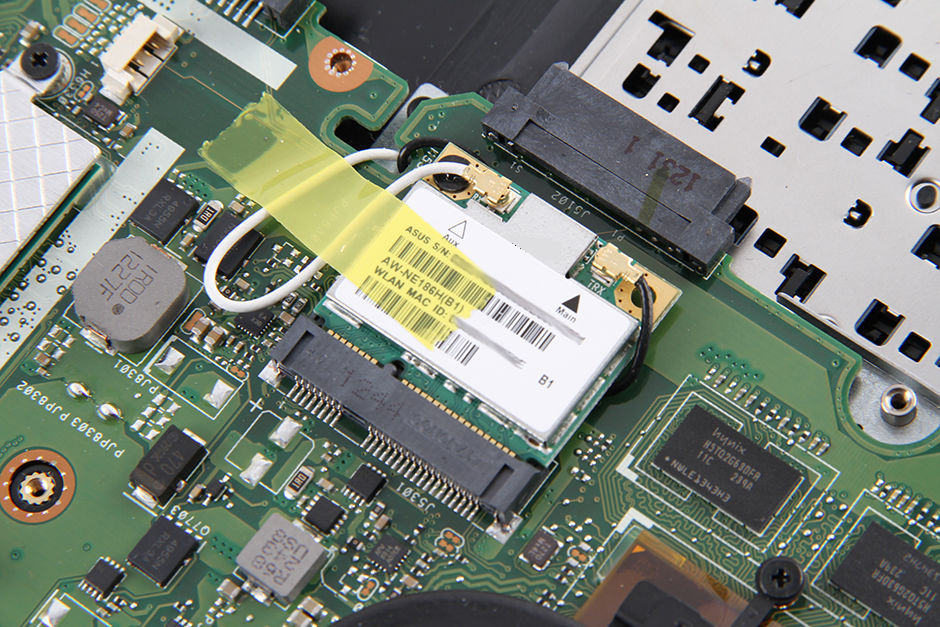
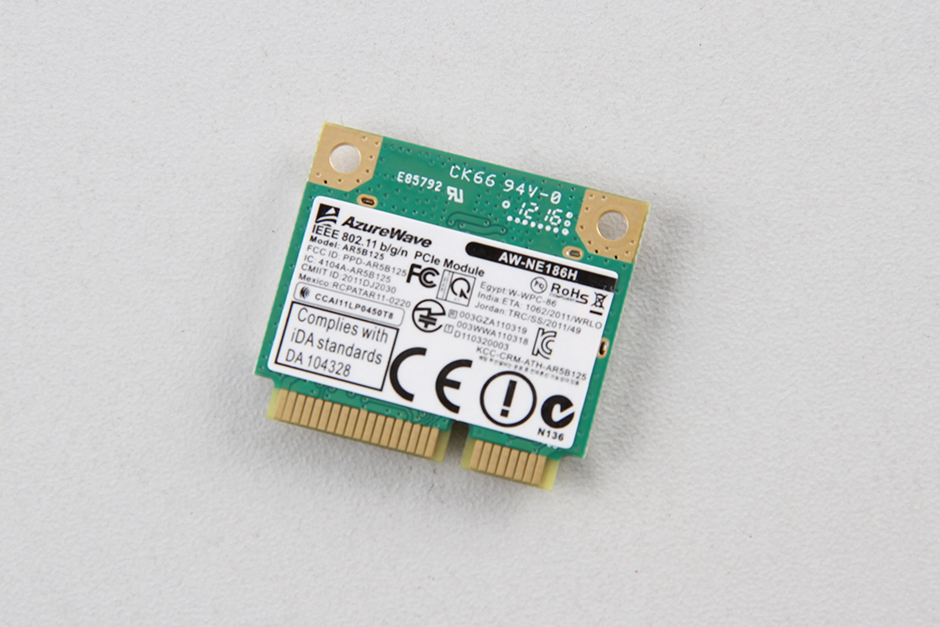
The laptop comes with an Azurewave AW-NE186H wireless card. The model number is AR5B125.
Disconnect the cable and remove the screw. You can remove the USB board.
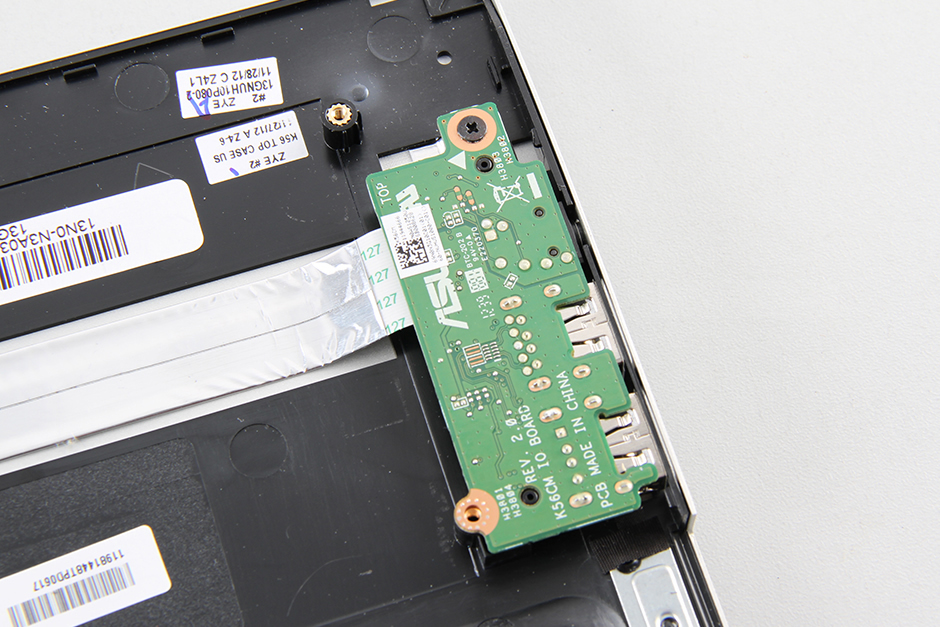
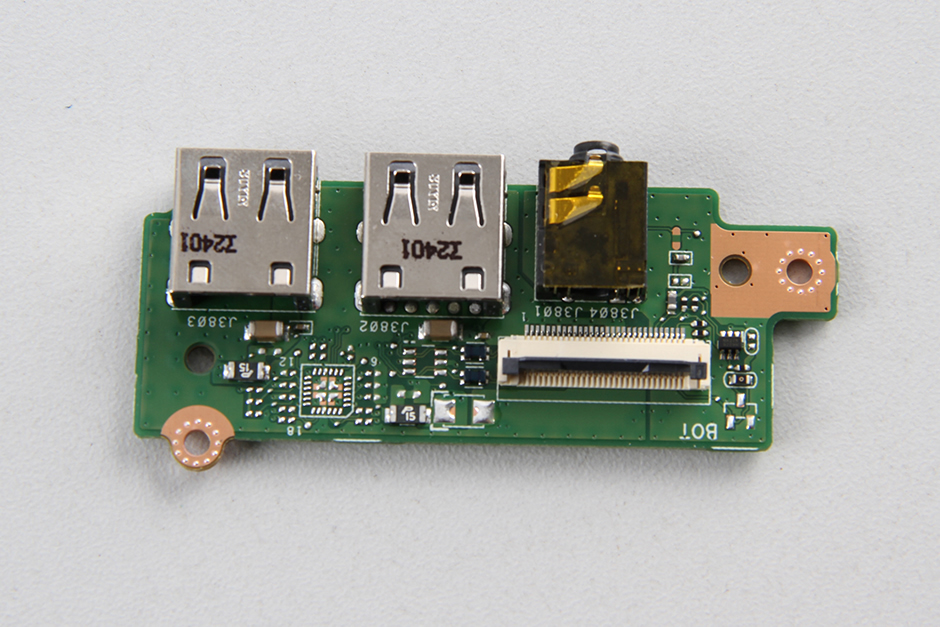
The USB board integrated two USB ports and a 3.5mm headset jack.
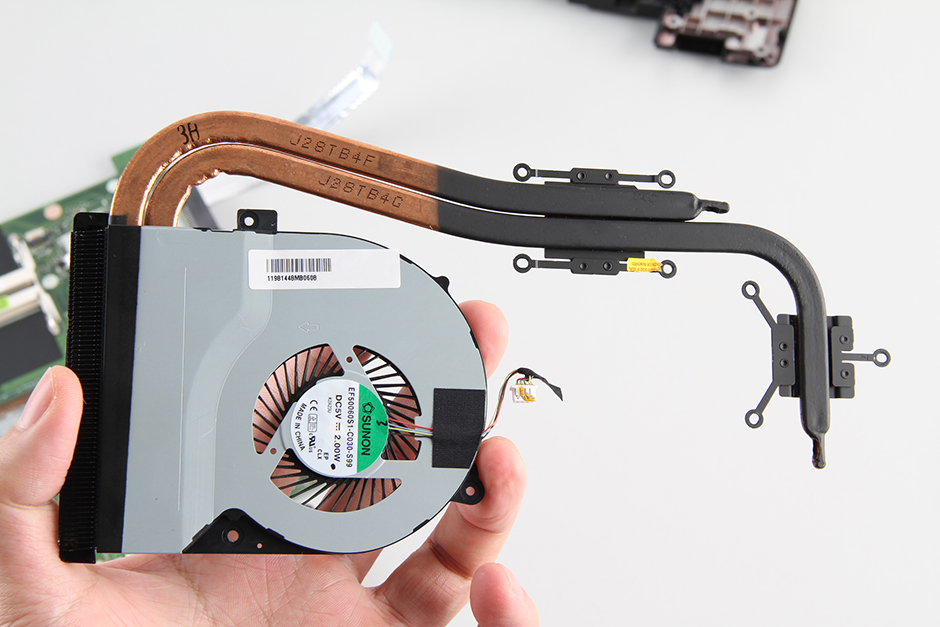
Remove the eight screws securing the heat sink and cooling fan, and then disconnect the fan cable from the motherboard. You can remove it.

The cooling system of the Asus VivoBook S550CM consists of two heat pipes and a fan, which simultaneously cover the processor and the graphics card.
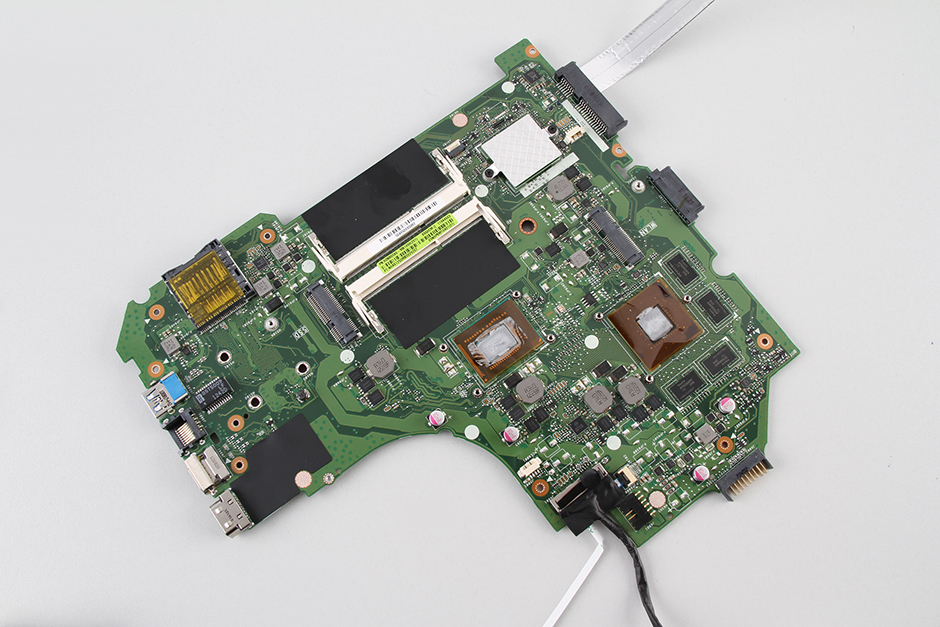
Asus VivoBook S550CM motherboard. The processor is soldered onto the motherboard, so it cannot be upgraded.
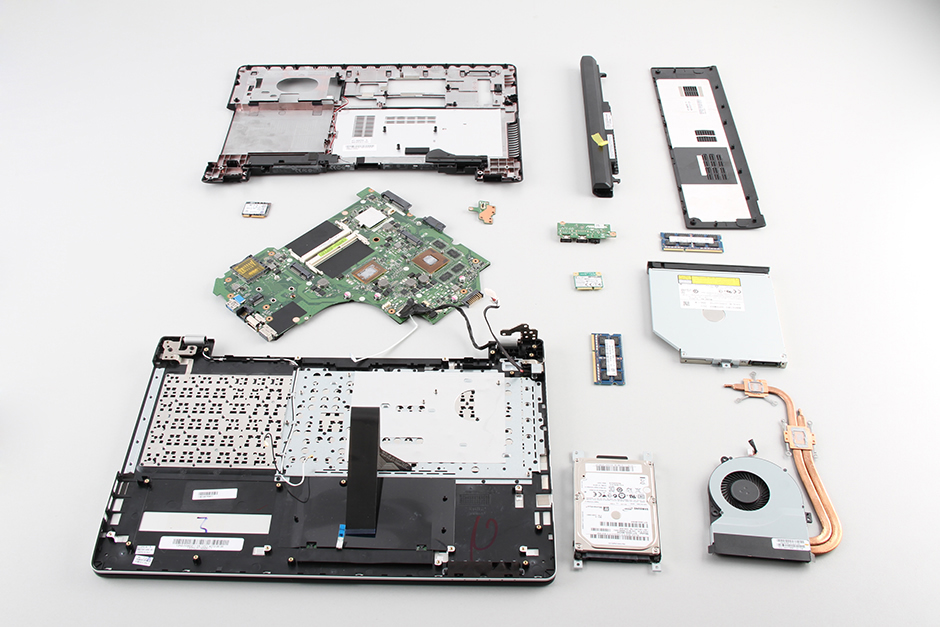
Asus VivoBook S550CM internal parts
Is this the easiest way to replace the keyboard?
Two questions:
1. If I’m swapping my HDD for an SSD, should I remove the 24GB cache drive?
2. Do you have any advice for removing the digitizer and LED panel? I’m trying to replace my panel, but I don’t want to crack the glass as I’ve never worked on a touchscreen before.
Thanks!!
Justin
You do not need to remove the 24GB SSD; you can search for an Asus maintenance guide for removing the touch screen.
Thanks so much for the reply! As for the repair manual, I have been searching for weeks for a guide or manual on how to remove a touchscreen from any Asus laptop (there are lots for the Asus tablet). I’ve tried googling for any very derivation of the Asus service manual but can’t seem to track one down. Could I bother you to point me in the right direction?
Cheers
Justin
Where is the video card location?
I need help removing the disc drive. I removed all the screws at sight, but the bottom board is still stuck at the DVD part. The rest of the bottom cover is already off.
Your question is not clear.
To remove the DVD drive, you only need to remove the single screw near the back of the case. You don’t need to take the case off to remove the drive.
If you’re talking about the HDD, it’s only the 3 screws shown in the above guide, and then the drive is easily removed (just slide it to the left to unplug, then it can easily be removed).
I’ve removed all the screws on the backside of the case. The DVD drive is not budging.
I think I’m stuck at the same point. Looking at other Asus tear-downs online, there appears to be a screw that releases the drive ~2″ to the left of the Asus label. On mine, there is a small square and an icon beside it that looks like a disc. I’m guessing that the square should pop off somehow to reveal the screw. I can’t get it to budge and don’t want to force it (especially if I’m wrong ;p), so I guess I’ll take it to a repair shop.
The screw for the optical drive is covered with a black rubber. Remove the rubber first.
Hi, is it possible to install an Nvidia graphics card? Is there an MXM slot? 🙂
Thank you
Hi, is it possible to change the CPU on this motherboard, or is it soldered on it?
Thanks
The CPU is soldered to the motherboard, so it can not be changed.
I have an Asus S550CB without an SD drive.
I want to add one, but I don’t know which kind of SSD drive is suitable for it. Can you help me?
I think Samsung 850 Evo and 750 Evo 2.5″ SATA3 SSD will work on your laptop.
Hi, is there a free MXM slot?
Yes
I showed it to a repairman, and he said that a mini m2 is suitable for it.
So can you guide me on which one exists?
Can anyone give me a guide or information on replacing the battery in the VivoBook S550CA?
Trying to decide if it’s worth doing.
Thank you.
Very enlightening post. I really appreciate it, if I may.
I own an S550CB-CJ020H with two 4GB DDR3 1600MHz RAM. I am wondering if it is possible to expand the RAM and fit my S550CB with two 8GB RAM modules.
If this is the case, do you have any suggestions on which 8GB RAM I should choose to get the maximum out of my S550CB?
Thank you very much.
Rob
As far as I know, the laptop supports a maximum of 8GB of RAM. However, you can contact ASUS to confirm this.
Thanks a lot.
I’ll check with ASUS.
I have this laptop (S550CB), which by default has 6 GB of RAM (2GB+4GB). I removed 2GB and replaced it with 4GB.
I don’t think that this laptop supports more than 8GB of RAM.
In the specifications table of this laptop: “Memory: DDR3 1600 MHz SDRAM, up to 8GB”
Thanks a lot for the information you provided.
Rob
I have an S550CA, which also states that it only supports a maximum of 8 GB of DDR3. I opened it up to change RAM, and it had 4GB and 2GB installed. The 4 was accessible, but 2 were only visible, as it was blocked by the case. I changed the 4GB to 8GB, and it saw 10GB, so I knew 8 was not the limit. The 2GB was still stuck inside. I continued to disassemble the case until I could reach the 2GB module and replaced it with an 8 GB module. Now I have 16GB, although ASUS and Crucial said only 8GB is supported, probably because the other chips are visible but not “user accessible”.
Can I replace the 24GB SSD with a 120GB SSD?
Yes! You can replace the 24GB SSD with a 120GB SSD.
What form factor is the SSD? I read that it is an mSATA, but it’s not the same size as a standard mSATA SSD.
It’s a mini mSATA SSD, but can I mount a standard-size mSATA?
It’s a half-size mSATA SSD. I found an interesting article http://tieba.baidu.com/p/3669513613 (in Chinese). The author moves the screw column to install the standard mSATA SSD.
I have an Asus s550cb-cj019h blocked by Intel anti-theft. Assistance can not resolve the issue. What can I do?